Cần trợ giúp về Chụp màn hình iPhone?
Bạn đã bao giờ ước mình có thể ghi lại một khoảnh khắc kỹ thuật số thoáng qua trực tiếp từ iPhone của mình để chia sẻ với thế giới, hoặc có lẽ chỉ để giữ cho bạn tham khảo? Cho dù đó là điểm cao trong trò chơi, lỗi bạn muốn báo cáo hay hướng dẫn từng bước, ghi màn hình trên iPhone đã trở thành một kỹ năng thiết yếu trong thời đại kỹ thuật số. Nhưng làm thế nào để bạn làm điều đó? Và một khi bạn đã chụp được cảnh quay quý giá đó, sau đó thì sao? Hướng dẫn toàn diện này được thiết kế để hướng dẫn bạn thông tin chi tiết về ghi màn hình trên iPhone của bạn, đảm bảo bạn sẽ trở thành một chuyên gia ngay lập tức.
Bật ghi màn hình trên iPhone của bạn
Biến iPhone của bạn thành một công cụ ghi âm màn hình chỉ cách vài thao tác. Để khai thác khả năng này, trước tiên bạn phải tích hợp chức năng Ghi màn hình vào Trung tâm điều khiển của iPhone để truy cập nhanh. Đây là cách thiết lập nó:
- Khởi chạy Cài đặt ứng dụng trên iPhone của bạn, được biểu tượng bằng biểu tượng bánh răng thường được tìm thấy trên màn hình chính của bạn.
- Lướt qua menu và chọn Trung tâm điều khiển để tùy chỉnh các tùy chọn của nó.
- Trong menu tiếp theo, bạn sẽ khám phá Ghi màn hình ẩn mình trong mảng 'More Controls'.
- Bên cạnh tùy chọn Ghi màn hình là biểu tượng dấu cộng màu xanh lá cây (+). Chạm vào nó, và voilà! Tính năng này tăng lên phần 'Kiểm soát được bao gồm', biểu thị trạng thái hoạt động của nó trong Trung tâm điều khiển của bạn.
Bằng cách thực hiện các bước đơn giản này, bạn đã trang bị hiệu quả cho iPhone của mình một công cụ tiện dụng để chụp nội dung trực tiếp từ màn hình của bạn, cho dù cho công việc, tạo hướng dẫn hoặc chia sẻ chiến thắng chơi game.
Bắt đầu ghi màn hình một cách dễ dàng
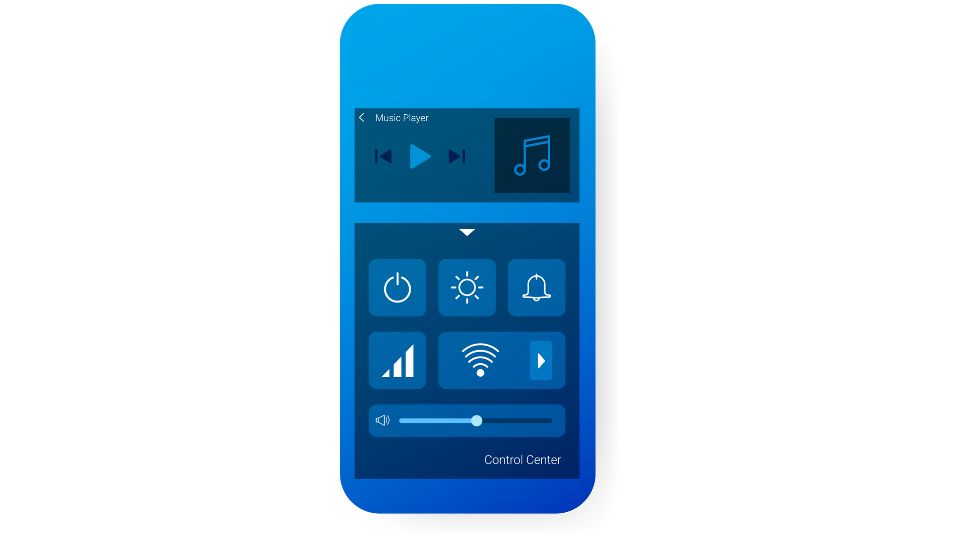
Bây giờ nút Ghi màn hình nằm trong tầm tay của bạn trong Trung tâm điều khiển, hãy đi sâu vào quá trình ghi lại hoạt động màn hình liền mạch của bạn:
- Để hiển thị Trung tâm điều khiển, hãy thực hiện vuốt xuống từ góc trên bên phải màn hình của bạn. Đối với những người có mẫu iPhone trân trọng nút Home, việc vuốt lên từ cạnh dưới sẽ làm được điều đó.
- Trong Trung tâm điều khiển, biểu tượng Ghi màn hình đang chờ bạn chạm — đó là biểu tượng có ngoại hình giống như mục tiêu: một vòng tròn rắn nằm trong vòng tròn.
- Sau khi chạm vào, một đếm ngược ngắn ba giây bắt đầu, cho bạn một khoảng thời gian để chuẩn bị trước khi bản ghi bắt đầu. Sau đó, bạn có thể tự do thoát khỏi Trung tâm điều khiển và đi qua iPhone của mình khi nó siêng năng ghi lại hành động của bạn.
- Như một dấu hiệu trực quan, thanh trạng thái hoặc chỉ báo thời gian ở đỉnh của màn hình sẽ đỏ ửng, một tín hiệu rõ ràng rằng màn hình của bạn đang ở dưới đèn chiếu ghi.
Với những hướng dẫn này, bạn đã sẵn sàng để ghi lại các trò chơi game, trình diễn ứng dụng hoặc bất kỳ hành động nào trên màn hình mà bạn muốn chia sẻ hoặc lưu giữ.
Tạm dừng ghi màn hình
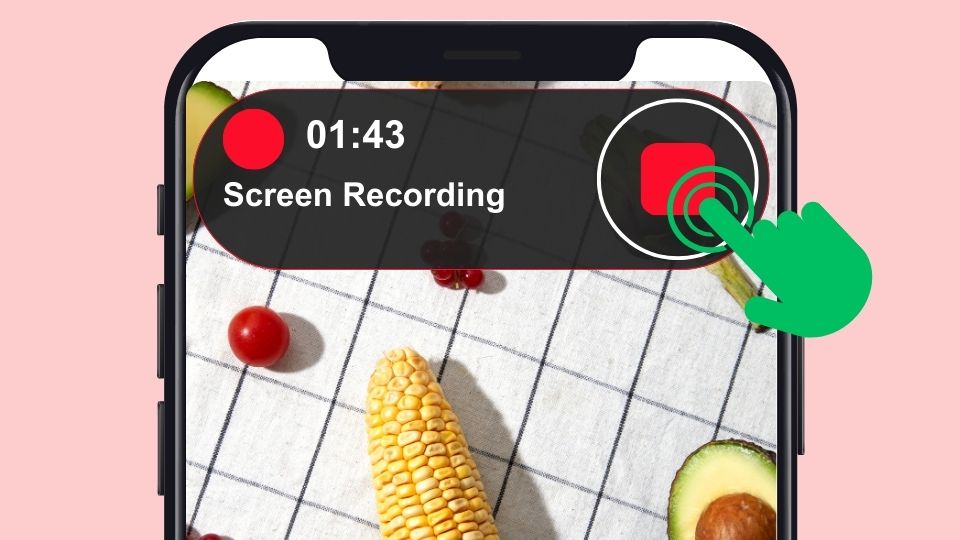
Khi thời điểm đến để kết thúc phiên quay màn hình của bạn, quá trình này cũng trực quan như vậy:
- Một cú chạm đơn giản vào thanh trạng thái màu đỏ hoặc chỉ báo thời gian, được hiển thị nổi bật ở đầu màn hình của bạn, là bước đầu tiên của bạn.
- Một cửa sổ bật lên xác nhận xuất hiện, hỏi bạn có muốn chấm dứt ghi màn hình hay không. Chọn Dừng lại để kết thúc quá trình ghi âm.
- Nội dung video mới của bạn sẽ tự động tìm thấy một ngôi nhà mới trong ứng dụng Ảnh của bạn, sẵn sàng để xem, chỉnh sửa hoặc chia sẻ.
Như một phương pháp thay thế, bạn cũng có thể dừng ghi trực tiếp từ Trung tâm điều khiển bằng cách nhấn vào biểu tượng Ghi màn hình một lần nữa — một phím tắt thuận tiện nếu bạn đang ở giữa một hoạt động và thích sự gián đoạn tối thiểu.
Chụp màn hình ghi âm bằng âm thanh
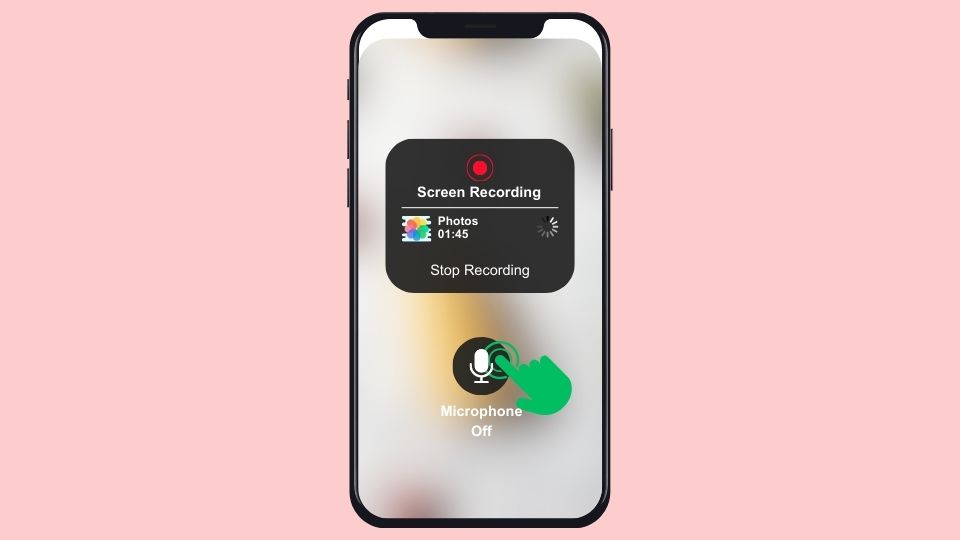
Đối với những khoảnh khắc khi màn hình của bạn yêu cầu thêm một lớp âm thanh — có thể là bình luận, tường thuật hoặc âm thanh trong ứng dụng — hãy làm theo các bước khuếch đại sau:
- Truy cập lại Trung tâm điều khiển bằng cách vuốt quen thuộc.
- Lần này, nhấn và giữ biểu tượng Ghi màn hình để hiển thị các điều khiển bổ sung.
- Một menu ẩn xuất hiện, hiển thị tùy chọn Âm thanh micrô. Nhấn vào nó để kích hoạt micrô của iPhone của bạn.
- Khi micrô được kích hoạt, chọn Bắt đầu ghi âm. Bây giờ bạn đang ghi lại cả nội dung hình ảnh và âm thanh để có trải nghiệm đa phương tiện hoàn chỉnh.
Cho dù bạn đang hướng đến việc tạo một hướng dẫn với hướng dẫn từng bước hay bạn đang tìm cách làm bất tử một cuộc gọi FaceTime đáng nhớ, các hướng dẫn này sẽ đảm bảo các bản ghi màn hình của bạn không chỉ được nhìn thấy mà còn được nghe thấy.
Định vị ghi màn hình của bạn
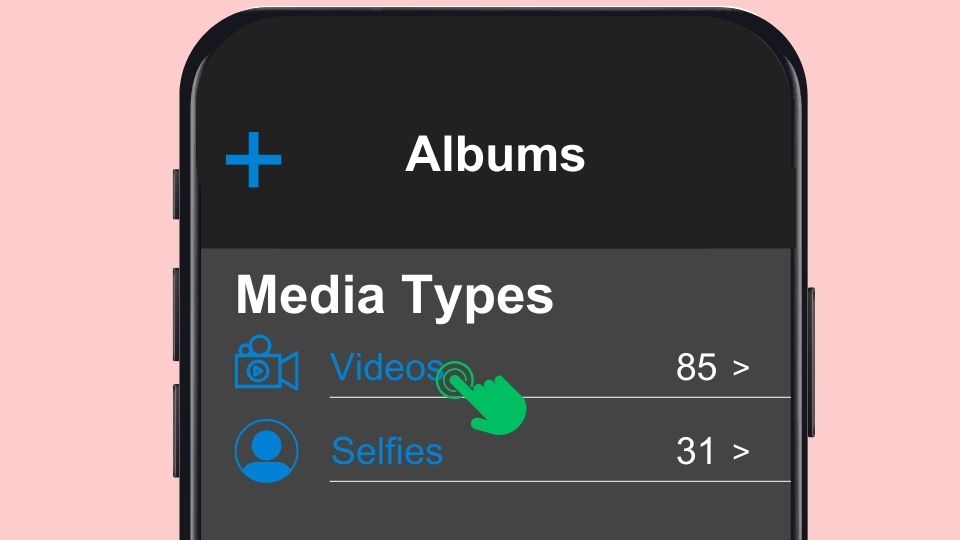
Sau khi bạn đã chụp thành công nội dung bằng tính năng ghi màn hình của iPhone, bạn có thể tự hỏi, “Bản ghi của tôi đã đi đâu?” Đừng sợ, vì việc truy cập các bản ghi màn hình của bạn thật dễ dàng. Dưới đây là cách bạn có thể định vị và quản lý bản ghi của mình:
- Mở Hình ảnh ứng dụng, là trung tâm trung tâm của bạn cho tất cả các phương tiện trực quan trên iPhone của bạn.
- Khi vào bên trong, hãy nhấn vào Album tab nằm ở cuối màn hình để điều hướng qua các danh mục khác nhau.
- Cuộn xuống Các loại phương tiện truyền thông phần và chọn Video album.
- Các bản ghi màn hình của bạn sẽ được nép mình giữa các video khác của bạn. Tuy nhiên, chúng rất dễ nhận dạng — hãy tìm thanh chỉ báo ghi màu đỏ ở đầu hình thu nhỏ, đây là một đặc điểm đặc trưng của nội dung được ghi trên màn hình.
Ngoài ra, để có cách tiếp cận trực tiếp hơn:
- Bạn cũng có thể nhấn vào Album tab và tìm một album có tên Ghi màn hình. Album này được iOS tự động tạo và sắp xếp cụ thể để chứa tất cả các clip ghi màn hình của bạn ở một nơi thuận tiện.
- Khi bạn nhấn vào Ghi màn hình album, tất cả các bản ghi của bạn sẽ được hiển thị theo thứ tự thời gian, với các ảnh chụp mới nhất ở phía dưới.
Với các bước đơn giản này, bạn có thể nhanh chóng tìm, xem và sắp xếp tất cả các bản ghi màn hình của mình. Cho dù bạn đang biên dịch một cuộn nổi bật, chia sẻ clip với bạn bè hoặc lưu trữ thông tin quan trọng, việc biết cách xác định vị trí bản ghi màn hình của bạn sẽ giúp việc quản lý phương tiện kỹ thuật số của bạn trở nên dễ dàng và hiệu quả.
Khắc phục sự cố thường gặp
Ghi màn hình không hoạt động
Không có âm thanh trong ghi âm
Ghi âm dừng bất ngờ
Mẹo và thủ thuật bổ sung

- Để tạo video mượt mà hơn, hãy xem xét bật chế độ “Không làm phiền” để ngăn thông báo bật lên trong khi ghi.
- Sử dụng các ứng dụng chỉnh sửa video để cắt các bản ghi của bạn hoặc kết hợp nhiều video.
- Để thiết lập ghi âm chuyên nghiệp hơn, hãy cân nhắc sử dụng micrô bên ngoài để có chất lượng âm thanh tốt hơn.
Bạn muốn hoàn thiện bản ghi màn hình iPhone của mình?
Khi bạn nắm bắt toàn bộ tiềm năng của tính năng ghi màn hình của iPhone, giờ đây bạn đã được trang bị để chụp và chia sẻ thế giới kỹ thuật số của mình một cách dễ dàng và chính xác. Cho dù đó là cho công việc, giáo dục hoặc các dự án cá nhân, khả năng ghi lại màn hình của bạn có hoặc không có âm thanh sẽ mở ra một lĩnh vực khả năng mới. Hãy nhớ chơi với các cài đặt, thử nghiệm với các kịch bản khác nhau và tìm cách tốt nhất để sử dụng các bản ghi của bạn để phù hợp với nhu cầu của bạn.
Với kiến thức mới này và một vài thao tác, iPhone của bạn biến thành một công cụ linh hoạt không chỉ ghi lại khoảnh khắc mà còn giúp bạn truyền đạt ý tưởng hiệu quả hơn. Vì vậy, hãy tiếp tục, nhấn nút ghi âm đó và bắt đầu tạo nội dung gây tiếng vang với khán giả của bạn, kể câu chuyện của bạn hoặc đơn giản là lưu giữ những trải nghiệm kỹ thuật số thoáng qua đó cho hậu thế. Ghi màn hình trên iPhone của bạn không chỉ là một tính năng; nó là một cửa ngõ cho sự sáng tạo và chia sẻ trong lòng bàn tay của bạn.


